Showing posts with label Aqua. Show all posts

Thursday, June 2, 2016

Quick Chicken Fence Repair

0

We found out the other weekend that wire mesh movable electric fences (one of these guys) and lawnmowers dont get along very well.  While trying to get into a tight spot behind the bee hive, the lawnmower managed to reach out and pull one slightly-less-than-taught section of the fence into the blade.

Heres a question for you: given that it takes the human brain around 0.2 seconds to process a stimulus and react, that the lawnmower blade spins at 200 rpm, and that the fence cost $165, can you calculate how many dollars per blade revolution the lawnmower did?  Ready, go.

Easy, you say?  0.2 seconds equates to 2/3 of a revolution, and the fence was obviously destroyed, bringing the total to $247.50 per revolution?

Wait, theres more information: first, we didnt have the fence electrified and werent planning to since it kept the chickens in just fine without electricity (until we put a big hole in it with the lawnmower), and second, we saved the wire wrapping that our rolls of hardware cloth and woven wire fencing came in, along with plenty of other wire scraps.  Turns out that, as long as we still dont want to electrify it, the cost was more like an hour of Jakes time, or basically, $0.00.

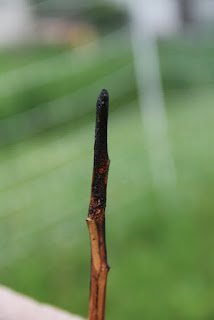
We started by laying the damaged section of fence as flat as possible, figuring out what strands were missing, then replacing the vertical missing vertical strands with pieces of 16 gauge wire.  Where there were a few remnants left, we tried to wrap them around the new wire.  We also fed the new wire through the horizontal strands when they were still intact.

Similar drill for the horizontal wires, except using the thinner wire that the hardware cloth roll was wrapped up in.  Our thinking is that the thinner wire will make it more flexible in the horizontal direction when we eventually roll up the fencing.  In extra-damaged places (like in the first photo), we wrapped the horizontal wire directly around the new vertical pieces.

The finished product doesnt look perfect, but it does keep the chickens out of the garden.  Will it ever be electric again?  Hard to know.  If we decide to try it, well update the post.  In the meantime, mission accomplished!


How do you do electric fence netting repair?


Read more

Interfaith Hunger Coalition Participates in End Hunger in New Mexico Summit

0

The Interfaith Hunger Coalition was present at the End Hunger in New Mexico summit this past Wednesday and Thursday.  Ellen Buelow (Holy Rosary Catholic Community) led a workshop  with the help of Judy Messal (All Saints Lutheran Church) and Kathy Freeze (Catholic Charities of Central New Mexico). The workshop presented the history, goals and mission statement of the IFC as well as some data on hunger in New Mexico (courtesy of our partner New Mexico Voices for Children.

While most of our work has been in Albuquerque, many of the participants in the workshop were from communities elsewhere in New Mexico, including Roswell, Ruidoso, Cloudcroft and the Navajo Nation. In addition to learning about the IHC, participants shared their experiences and challenges working with people who are vulnerable to hunger.  For the members of the Chaves County  J.O.Y. Centers (pictured at left), a main concern was hunger among seniors.

 We also had a display table coordinated by Bert Scott (Central
United Methodist Church). Most of the materials for the display were designed by Jeanne Elmhorst (Albuquerque Mennonite Church).  Many people volunteered to staff the table, including Joy Dinaro (Immaculate Conception Catholic Church) and Ian Wood (Archdiocese of Santa Fe), pictured at left, Carole Everton (Holy Rosary Catholic Community), Kathryn Arndt (Community of Hope) and others . We hope that our presence at the summit allowed more people to know about us, which is an important step in the growth of our coalition.

Read more

Mercy is that which God likes Most

0

"Let us abandon all fear and dread, for these do not befit men and women who are loved. Instead, let us live the joy of encounter with the grace that transforms all."   -Pope Francis
The Cloisters Museum, New York
On Dec. 8, Pope Francis launched the Jubilee Year of Mercy, an effort to focus the mission of the church and of the faithful on mercy and forgiveness rather than on judgment. This is a call for both individuals and for the institution.

"This Extraordinary Holy Year is itself a gift of grace," Francis said during the homily at a Mass in which he proclaimed the start of this extraordinary effort. "To enter through the Holy Door means to rediscover the deepness of the mercy of the Father who welcomes all and goes out to meet everyone personally."

"If we were to forget, even just for a moment, that mercy is that which God likes most, every one of our labors would be useless because we would become slaves of our institutions and our structures, however renewed they might be," the pope said the next day at his general audience in St. Peters Square. "We would always be slaves."

The U.S. Conference of Catholic Bishops offers five suggestions on how to answer this call to be merciful. In a post on the USCCBs Go Forth blog, education and outreach director Jill Rauh invites us to Pray for awareness of God in our own lives, to Pray with the Gospel, to Encounter, to Prepare to be Merciful, and to Realize that We are all in this Together.

"These exercises for prayer and reflection are only a start. Preparing our hearts for the Jubilee Year can help us live out Pope Francis’ vision in Evangelii Gaudium of a Church, which, “guided by the Gospel of mercy and by love for mankind, hears the cry for justice” and responds to Jesus’ command by Mark 6:37 (full context, Mark 6: 30-44) by “working to eliminate the structural causes of poverty” (no. 188)," said Ruah. "We start with prayer, then reach out to encounter others. Then we learn and discern together about how we might be called to act. The Jubilee Year of Mercy is the perfect opportunity to engage this process." Read full  blog post

Read more

Freezing Dandelions

0

As we were out in the yard this weekend, seeking some kind of gardening activity that didnt require digging in the still-too-wet-for-planting dirt, we decided it was time to weed under the chicken tractor row cover that was protecting our overwintered swiss chard and garlic.  The row cover is slightly wider than the garden bed, which meant that immediately inside the walls was a tall, lush layer of grass and dandelions.

Some of the dandelion flower stalks were a full two feet long, and the leaves were approaching a size that would make romaine lettuce jealous.  Those huge dandelion leaves, which grew much faster than their counterparts outside of the mini greenhouse, were naturally less bitter because the plant focuses more on biomass production than defense systems (in our minds, anyway).  Which is all another way of saying that, even though they were more than wed need for this weeks meals, theyd be a real shame to waste!  Why dont we try freezing some to save for later?

A quick search of the internets reveals that, of course, were not the first folks to formulate such a plan.  It turns out that blanching the greens just like spinach, chard, collards, or other things normal people eat, works just as well with dandy greens (although maybe we dont even need to blanch them before freezing).  Heres a brief rundown of our new protocol for preserving one of the most exciting parts of spring.

We rinsed all the dirt (of which there wasnt much) and dandelion seeds (of which there were a lot) off the greens, then coarsely chopped them and set them soaking in a bowl of water.  (Even though the plants had already gone to seed, chopping and soaking the leaves takes the bitterness down to an acceptable level.)  We usually soak twice with a change of water in between, and usually for half an hour per soak, although the second soak went overnight on this particular batch.

Then we drained off the water and transferred the greens into one of these-type pots, with a big pasta insert.  The outer pot has a couple inches of boiling water in it, and we steam blanched the dandy greens in two batches of about a half pound each, for three minutes each.

Steam away, little dandies! (We took off the cover to take the picture.)

Then we quenched in cold water for a minute or two...

...and transferred the chilled greens to a salad spinner to get most of the residual water out.  Just sitting in the strainer basket does a pretty good job, but actually spinning them really gets er done.

We put them in freezer baggies, and now theyre ready to hibernate!  Whats the easiest way to get the residual air out of the bags?  We seal them most of the way across, push most of the air out by hand, then press the unsealed inch or so to our lips and suck the rest out like reverse CPR.  While still applying suction, we seal the bag the rest of the way across.  Dont tell the NCHFP! 

Even though we froze the whole batch, we still wanted some for this week.  So almost as soon as they were frozen, we took one bag out and made a quiche, which also incorporated some overwintered green onions, dried tomatoes from last summer, and some frozen sorrel from last weekend. 

As a point of reference, the green stuff in the lower left part of the slice is some of the dandy greens (mostly leaf stems), and the top and right pieces of green are the sorrel. The texture of both types of greens were pretty good, so in addition to the blanched and tasty frozen dandies, it looks like just sticking the sorrel in the freezer works pretty well.

How do you preserve your dandelion greens?

Read more

Wednesday, June 1, 2016

The Deadliest Catch

0

The Discovery Channel says its program last year, Deadliest Catch, on the king crab fishery in Alaska was the most successful series introduced in ten years. So naturally they want a repeat.

The new series, with the same name, starts on 9 Pm Tuesday March 28. In this new series the film crews accompanies king crab boats fishing in the fishing for the first time under a quota based fishery. The new series drama is more about fishermen, their luck, the skill of finding crab and the industry in general.

I dont comment much on made for tv stuff, but the past series did a tremendous job popularizing crab and fishing in general many people got their first impression of commercial fishing from the show.

Link to the series information

Read more

Family Promise Founder to Speak at Grand Opening of New Day Center in Albuquerque

0

Karen Olson, the founder of Family Promise, is the featured speaker at the grand opening of the new home for the organizations Albuquerque affiliate on Sunday, November 1, 2015, at  3:00 p.m. You are invited to come hear her amazing story and to celebrate Family Promise of Albuquerques new space and expansion at 808 Edith Blvd NE (map).  For more information, call 505-268-0331.

Below is a speech that Ms. Olson gave at the  University of Arkansas Clinton School of Service in May of 2011. 

Read more

The Science and Engineering of Smores

0

We realize this post is a few days too late for the first major camping weekend of the summer, but the truth is, we needed a tune-up on our smores theory and practice ourselves.  So now, while the extensive refresher training we completed over the last few days is still at the front of our minds, we wanted to put out a short treatise on the intricacies and nuances of marshmallow roasting and smore eating.

The first step in creating a smore is to initiate the thermal oxidation of some woody biomass.  To avoid marshmallow ignition, we want radiant heat from the coals rather than heat from the gas-phase oxidation occurring in flames. That requires full primary combustion of the wood, which takes a considerable amount of time.

The second step is to select a marshmallow roasting device from a nearby tree or shrub, taking care to avoid the species Toxicodendron vernix.  The geometric outlay of the device is to some degree a matter of personal preference, but weve found that a half inch diameter at the base tapering to approximately a quarter inch at the business end, and 2.5-3 feet long, to be optimal for most common campfire heat intensities and standard-size marshmallows.

Similarly, the optimal linearity of the device is a subjective matter.  Some prefer a higher degree of linearity to facilitate a uniform axial rotation during roasting. Others prefer some curviness to allow the roaster to reach preferred roasting locales within the campfire from any position around the fire ring, including those toward which the smoke is not traveling, and independent of other smore engineers who may be occupying prime roasting real estate.

Nearly all experts agree, however, on the advantage of a barbed tip to prevent marshmallow disengagement from the device during the later stages of roasting, when the rigidity of the melty marshmallow core has deceased significantly.  Similarly, there is nearly universal agreement that removal of the bark from the tip of the device prevents inadvertent transfer of bark particles to the marshmallow.

In theory, pure radiative heat from glowing embers produces the most satisfactory roasting experience.  However, in practice, maintaining sufficient heat flow from a bed of embers over the course of tens of minutes that comprise a typical roasting session is challenging (as is having the patience to wait for the wood to finish burning down to coals).  Thus, the optimal sustained roasting environment often requires a combination of actively burning wood and pockets of glowing embers.

With the marshmallow applied to the roasting device, and roasting commenced over an appropriate heat source, the sugars in the outer shell of the marshmallow will begin to caramelize.  The primary chemical challenge during roasting is to uniformly caramelize the entire shell without charring or igniting any part of it.  The preferred technique among experts is a slow, rotisserie-style rotation at 4-6" from the embers, though few possess the patience to functionally sustain such an activity for the duration of the roasting operation. Another challenge is roasting the surface closest to the base end of the roasting device.  There may be some advantage to loading the marshmallow onto the device axially to minimize the surface area facing the base end (since the flat side of the marshmallow is smaller than the curved section), and then lightly smooshing the marshmallow to convert some of the base-facing surface into side-facing surface.

When the marshmallow is satisfactorily caramelized, it can be assembled into a smore, with graham crackers and chocolate as co-ingredients.  In some circles, a preferred embodiment of the smore is one which can be eaten cleanly (i.e., without loss of melted marshmallow to the eaters face or hand, or to the ground).  In such an embodiment, the chocolate and graham must be of the correct pliability, such that biting into the smore results in neither excessive compression of the marshmallow nor shattering of the graham cracker components.  The desired pliability can be achieved by mild heating of the graham and chocolate for 4-5 minutes while roasting the marshmallow (resulting in a final temperature of 100 - 105 °F).  More intensive heating melts the chocolate and toasts the graham, effectively exacerbating the problem.

A proper grip on the smore can also help keep the smore intact while biting.  As this hand model is demonstrating, a firm grip in one quadrant of the graham, using the end section of the first two fingers and the thumb, is optimal for minimizing transfer of marshmallow to the hand while maximizing the exposed area on which to apply the bite.  Large bites, up to the size of the entire smore, also minimize brittle fracture of the graham into the hand.

After roasting one- or two dozen marshmallows, the roasting device can be saved for future use, but a bit of maintenance and cleaning will help preserve its integrity and avoid attracting ants.  A first step in cleaning is commonly to remove as much marshmallow residue as possible by mouth.

Particularly recalcitrant residue can be removed by charring the tip, followed by wiping with an appropriate material, such as a t-shirt or nearby grass.  The health benefits of any residual char that may be transferred to future marshmallows are unclear, but related products are highly valued in some types of cuisine (an explanation of the scientific function of biochar in the digestive tract can be found near minute 19 in the video accompanying the previous link, although the entire episode provides a much more compelling narrative if one is amused by the non-sequitor nature of Japanese cartoons).  The roasting device can be stored somewhere relatively clean and out of the fire pit until needed again.

In conclusion, many factors must be considered to produce an optimally roasted marshmallow and a satisfactorily engineered smore.  We hope this primer has helped elucidate some of those factors, but we welcome additions and suggestions to incorporate into the second edition of this text.

What is your preferred marshmallow-roasting protocol?


Read more

Dakota Rocket Silo version 3 0

0

We love our Dakota Rocket Silo--it helps us cook outside, put our pruning brush and small-diameter dead trees to good use, render wax, make biochar, and do lots of fun things.  But the original and rebuilt designs had one flaw that cropped up during extended use:


The piece of ground between the holes gets baked pretty good, and eventually weakens and starts crumbling, which makes the chimney part not level.  It might not be as much of a problem with wider cinder blocks where more of the support comes from the sides.

But weve got skinny cinder blocks, so we took out the middle part and built a brick foundation.  Theyre not fire bricks, so they probably wont last too long, but they were free!  This setup lets us keep the in-ground aspect that we like so much, but hopefully will stay level for longer.  Plus, it looks kind of Petra-esque.

We fired it up, and sure enough, it burns like a champ.  Next test: will it stay level through a winter?

JalapeƱo popper, anyone? (They took a LONG time to cook this way, but they were really good!)


Read more

Arctic Char In Sustainable Farming

0

picture of high density arctic char farming in tanks
Arctic Char Growing In Tanks
My experiences raising Arctic Char in land based farms using tanks and raceways, with groundwater supplies and water recirculation aquaculture systems, have been positive overall.

I am what you may call a Charr fanatic since the early eighties and most of my experience has been hard won. The road to now has had its share of bumps and even a couple of cliff sized falls. There have fortunately also been some sunny times and even pay days. It has been interesting and rewarding in many ways but also frustrating at times.

I have grown Char at stocking densities that exceed the normal for rainbow trout or salmon in similar farming systems. In a properly designed and operated land based farm, this factor can lead to increased production amounts per unit of rearing space. The high density stocking characteristics of the species can allow the production intensification necessary in controlled systems and provide increased economy of scale, helping to offset the increased costs of building eco-friendly land based fish farms.Full article published at northernaquafarms.com "Arctic Charr Aquaculture - History and Experiences in Canada"

Related Content

Hobby Farming - A Growing Trend
Water Recirculation Aquaculture
Aquaponics - Sustainable Farming


Read more

Tuesday, May 31, 2016

Impressive Group of Speakers to Address End Hunger Summit

0

Krista Kelley, is seen as a visionary in the design and implementation of numerous projects that have changed the course of New Mexico communities through hunger, healthcare, employment and access to vital services... Albuquerque kindergarten teacher Sonya Romero has gained international recognition for her generosity toward students at Lew Wallace Elementary School....Since 1984, Pastor John Hill has served his fellow man in the non-profit sector, focusing on individuals coming directly out of the prison system, with drug and alcohol addictions, or with employment challenges...Rev. Jack Bunting is currently serving as the President/CEO of the St. Felix Pantry, Inc. in Rio Rancho, and continues to be passionate about serving the needs of the poor, hungry and hurting within Sandoval County and the State of New Mexico...Sherry Hooper took over as executive director for The Food Depot, Northern New Mexico’s food bank in September, 2001. Ms. Hooper co-founded the Santa Fe Food Policy Council and served on the Council as a City of Santa Fe appointee for four years...Crystal Fitzsimmons leads FRAC’s work to increase participation the federal school, summer, and afterschool nutrition programs. She analyzes policy to advocate for legislative and regulatory... improvements to increase low - income children’s access to the nutrition programs...Veronica Garcia became New Mexico Voices for Children’s executive director in 2012... As New Mexico’s first Cabinet Secretary of Education, she pushed for funding for programs such as school - based health clinics, breakfast in the schools, and elementary physical education.
The Second Annual End Hunger in New Mexico Summit, scheduled for Sept. 23-24, will feature an impressive group of keynote speakers. [Archbishop John Wester of the Archdiocese of Santa Fe was originally scheduled to address the event, but something came up (Pope Francis visit to the U.S.!)]. The Albuquerque Marriott, 2101 Louisiana Blvd. (map), will be the site of the summit. Two of the keynote speakers lead organizations that have endorsed the Interfaith Hunger Coalition (IHC): Adelante/The Storehouse and New Mexico Voices for Children. The IHC will have a display at the summit and will also be presenting a workshop on Wednesday, September  23, !;45-2:45 p.m. in the Acoma Room. Here is a description of our workshop

Faith In Action: An Introduction to the Interfaith Hunger Coalition
* Ellen Buelow, Interfaith Hunger Coalition
Our interactive workshop introduces participants to the vision and activities of the Interfaith Hunger Coalition focused in three areas; education, advocacy and direct action. Here’s an opportunity for faith communities to collaborate in a common place. Explore how you and your organization can join forces without duplication of services.

Check out the full schedule of events, including descriptions of all the workshops and more information about the keynote speakers. You can register on site at the summit on September 22-24. The registration fee is $20. Participants are encouraged to bring non-perishable food items, which Desert Harvest will distribute to feeding sites in Albuquerque.

Read more

An Ode to Sorrel

0

If you ask a homestead-minded person what their favorite spring greens to forage are, youll probably get responses like dandelions, lambs quarters, mallow, maybe even stinging nettles.  But one thats rarely mentioned is sorrel (or the related dock).  Its the Rodney Dangerfield of spring greens. (It dont get no respect!)  Thats a real shame, because Rumex species are delicious, nutritious, and high-yielding.  We recently had the chance to gather up a mess of sorrel growing in our back yard and cook it up into a couple of dishes that are likely to become mainstays in our culinary rotation. That is, they were tasty, pretty easy to cook, and the main ingredient (sorrel) is easy to gather a lot of over a long season.  Read on, and hopefully be inspired to forage some sorrel yourself!

Here is the sorrel in its natural environment.  Whats that you say? Its hard to discern it from all the burdock, buckthorn, and other weeds?  Thats just our first line of defense against sorrel poachers.  Were pretty sure this cultivar is common sheep sorrel, Rumex acetosella.

Here is a comparison for how much sorrel we were able to harvest (right) in roughly the same amount of time as it took to pick the swiss chard (left).  That is, although we didnt calculate it, the Berry Modulus is probably higher for our sorrel than our chard.  We rinsed the sorrel, sent the leaves into a couple varieties of sorrel pesto, and the sent the stems into a soup. (The chard went into a quiche.)

For pesto, we used this recipe as a starting point, then improvised from there. We only had ground almonds for the nutty part, but they worked.  We used garlic powder instead of raw garlic cloves for one batch; that also worked.  We also added black pepper.  Lastly, we committed pesto heresy and replaced the parmesan cheese with a regular old monterrey jack in one batch, and that worked, too.  If that means we cant call it pesto any more, so be it. Its a seasoned, cheesy, sorrel-based green-colored spread dip thing.  Call it what you like.

Meanwhile, we also had the crock pot full of chopped carrots, potatoes, green onions, celery, sorrel stems, and a lamb leg roast.  Other meats that would be good in this application include, but are not limited to, chicken, venison/beef, and pork.


When the meat was done, we trimmed and sliced it up, and set it on top of some pesto-smeared toast.  By toast, we mean bread rendered brown and crispy by hot butter in a frying pan.

Taking the roast out of the crock pot left a bunch of veggies, which we made into a creamy soup by adding some heavy whipping cream and plain yogurt.  Good stuff, Maynard!

As a side note, sorrel changes color from a bright, cheerful green to a drab army/olive color and falls apart when cooked.  So if youre going to cook it, make sure to hide it in a casserole or something.  It seems to hold its color ok when frozen (provided you dont blanch it first), but we havent tried making anything out of the frozen stuff yet.  Well report back later on how that goes.

How do you eat sorrel?  What other greens are you foraging this time of year?  Let us know in the comments section below!

The Recipe
2 lb roast (lamb, pork, venison, or chicken)
1 lb carrots, sliced
1 lb potatoes, cubed
1 lb celery, sliced
0.25 lbs green onions, sliced
Stems from 1.5 lb sorrel
1 cup water
1 Tablespoon each garlic powder, oregano, black pepper
1.5 teaspoons each salt and red pepper
0.5 cup heavy whipping cream
0.5 cup plain yogurt
2 Tablespoons flour

Leaves from 1.5 lb sorrel
3 garlic cloves or 1 teaspoon garlic powder
0.5-0.75 cup pine nuts or sunflower seeds, or 0.25-0.5 cup ground almonds
0.5 teaspoon salt
0.25-0.5 cup olive oil
0.5 cup grated cheese

3 Tablespoon butter
6 slices bread

Cook roast, carrots, potatoes, celery, green onions, and sorrel stems in the water in a crock pot until meat is cooked through and tender, seasoning with garlic powder, oregano, black and red pepper, and salt to taste.  Remove meat, trim and slice.  Add whipping cream, yogurt, and flour to remaining soup, cook until slightly thickened.  While roast is cooking, make pesto from sorrel leaves, garlic, nuts, salt, olive oil and cheese. (Put everything in a food processor and process until creamy and spreadable.  Coarsely chop sorrel leaves before adding to processor to avoid bridging.)  Melt butter in frying pan, brown one side of bread, flip, and brown other side.  While the second side is browning, top bread with pesto and sliced roast.  Serve with soup and smiles.

Read more

Growth Spurt!

0

The tomatoes, chard, and peppers in the basement system are now growing vigorously! The tomatoes especially have surged in height. As you can see below, in just four days each tomato plant gained about five to seven inches!

Left: Grow bed on 5/27/2011 Right: Grow bed four days later on 5/31/2011
I needed to transplant these tomatoes, because I was heading out on vacation, and I worried that they would grow into the light, causing a fire hazard. Originally, I planned to transplant these into my outdoor aquaponic system; however, they had grown so fast that the outdoor system didnt yet have the necessary nitrate levels. Instead, I transplanted them into pots with soil. To make up for these, just before I left, I planted more tomato seeds, in addition to cucumbers and summer squash. By the time I return, I expect they will have sprouted and the outdoor system will have enough nitrate to receive them.  Im interested to compare the growth and output of the tomatoes that spend their whole life in the aquaponic system, the ones I transplanted to soil, and others that Ive had in soil since seedling stage.

I was happy to discover through this indoor tomato experiment that tomatoes could thrive in shallow grow beds. The expanded clay grow bed is only about three or four inches deep, yet the plants grew tremendously. You can see from the photos below that once I washed the clay pebbles out of the roots, they were only a few inches long. Of course this is a direct result of the aquaponic growing method: with nutrient rich water delivered regularly right to the plant, roots do not need to travel far to find sustenance.

Roots of heirloom tomato before transplant 6/1/2011
I reason that the shallow bed worked well because of the cool temperatures in the basement. Outside, such shallow beds would fail because the tomatos shallow roots would get baked in the sun. If I used this for future indoor projects, it means I could reduce the amount of media I need to purchase and the amount of weight the table must support.

Meanwhile, the chard has grown rapidly and the hot peppers have sprouted flowers (much to my surprise because of the dominance of blue light from the metal halide bulb).

Two types of rainbow chard in clay grow bed on 5/31/2011
Buds on hot pepper plants 5/31/2011

Read more

Homestead Happiness April Week 3

0

More fresh veggies, an archeological discovery, and grass-craving chickens made us happy this week.

Our onion sets from last year that didnt produce bulbs, are just the right size for eating as green onions right now.  And since we want to use that garden space for other veggies this year, its a perfect storm for green onion-themed cuisine. Yum!

While digging up a garden bed, we hit a buried brick.  Further digging revealed that it was actually a line of bricks, two wide, and about six inches underground.  We havent had a chance to chat with the neighbors yet to see if they know what its from, but clearly some sort of man-made thing used to exist here.  Could it be a clue about our absurdly high selenium levels?

Weve also been finding pockets of dirt where the soil particles are held together by some sort of white material.  It looks slightly filamentous, but is very crumbly at the same time.  Some kind of good fungus, we hope?

We had a few inches of snow last Thursday, but the chickens could see green grass under the picnic table and freshly turned dirt out in the yard.  When we got home from work, we could tell they had a case of coop fever.  It makes us happy that the chickens arent content to just hang out in the coop all day.

What made you happy this week?

Read more

Christmas Blessings from Bread New Mexico

0


When the white stars talk together like sisters
And when the winter hills
Raise their grand semblance in the freezing night,
Somewhere one window
Bleeds like the brown eye of an open force.

Hills, stars,
White stars that stand above the eastern stable.
Look down and offer Him.
The dim adoring light of your belief.
Whose small Heart bleeds with infinite fire.

Shall not this Child
(When we shall hear the bells of His amazing voice)
Conquer the winter of our hateful century?

-Thomas Merton, excerpts from A Christmas Card (1947)
(see full poem in Thomas Mertons Marian Poetry, University of Dayton)

Read more

Early experiments 70 liter Aquaponics using aquarium

0

When the NFT system started to grow, i began looking up online about aquaponics and came across a lot of content and realised this is a wonderful food production system.

So i decided to try a small growbed system. I had few small tubs and an old decommissioned aquarium lying around and so i decided to make use of it. So first i built a wooden table, just to hold the growbeds/tubs above the aquarium.


After a visit to the hardware store, I created the siphon mechanism using pvc pipes and connected the water flow mechanism whole system. I did not use any taps to regulate the water flow as this was an early experiment. Just wanted to see how basic can this setup be.


My NFT system was giving a bit of a problem and so i decided to transplant all the plants form there to this grow bed system. Since i wanted to remove the NFT system and plan a bigger Aquaponics unit in its place. The transplanted tomatoes started to grow really well. This system has a 70 liters aquarium below the tubs and it has 10 goldfish and a few guppies.


Days, weeks and months later ... lust look at the way the plants have grown and in 4 months time of just feeding the fish twice daily and topping up water as and when the level dropped a little due to evaporation. After this system completed six months i learned a lot about the simple science behind aquaponics, and once you follow those life becomes easy.

I learnt a lot like the right size of growbed, the right growing media and size the water flow rate how it drains out etc. Then i decided to go bigger .. My next project a 500 liter aquaponics setup.


Read more

 
Powered by Blogger