Showing posts with label an. Show all posts

Tuesday, May 31, 2016

An Ode to Sorrel

0

If you ask a homestead-minded person what their favorite spring greens to forage are, youll probably get responses like dandelions, lambs quarters, mallow, maybe even stinging nettles.  But one thats rarely mentioned is sorrel (or the related dock).  Its the Rodney Dangerfield of spring greens. (It dont get no respect!)  Thats a real shame, because Rumex species are delicious, nutritious, and high-yielding.  We recently had the chance to gather up a mess of sorrel growing in our back yard and cook it up into a couple of dishes that are likely to become mainstays in our culinary rotation. That is, they were tasty, pretty easy to cook, and the main ingredient (sorrel) is easy to gather a lot of over a long season.  Read on, and hopefully be inspired to forage some sorrel yourself!

Here is the sorrel in its natural environment.  Whats that you say? Its hard to discern it from all the burdock, buckthorn, and other weeds?  Thats just our first line of defense against sorrel poachers.  Were pretty sure this cultivar is common sheep sorrel, Rumex acetosella.

Here is a comparison for how much sorrel we were able to harvest (right) in roughly the same amount of time as it took to pick the swiss chard (left).  That is, although we didnt calculate it, the Berry Modulus is probably higher for our sorrel than our chard.  We rinsed the sorrel, sent the leaves into a couple varieties of sorrel pesto, and the sent the stems into a soup. (The chard went into a quiche.)

For pesto, we used this recipe as a starting point, then improvised from there. We only had ground almonds for the nutty part, but they worked.  We used garlic powder instead of raw garlic cloves for one batch; that also worked.  We also added black pepper.  Lastly, we committed pesto heresy and replaced the parmesan cheese with a regular old monterrey jack in one batch, and that worked, too.  If that means we cant call it pesto any more, so be it. Its a seasoned, cheesy, sorrel-based green-colored spread dip thing.  Call it what you like.

Meanwhile, we also had the crock pot full of chopped carrots, potatoes, green onions, celery, sorrel stems, and a lamb leg roast.  Other meats that would be good in this application include, but are not limited to, chicken, venison/beef, and pork.


When the meat was done, we trimmed and sliced it up, and set it on top of some pesto-smeared toast.  By toast, we mean bread rendered brown and crispy by hot butter in a frying pan.

Taking the roast out of the crock pot left a bunch of veggies, which we made into a creamy soup by adding some heavy whipping cream and plain yogurt.  Good stuff, Maynard!

As a side note, sorrel changes color from a bright, cheerful green to a drab army/olive color and falls apart when cooked.  So if youre going to cook it, make sure to hide it in a casserole or something.  It seems to hold its color ok when frozen (provided you dont blanch it first), but we havent tried making anything out of the frozen stuff yet.  Well report back later on how that goes.

How do you eat sorrel?  What other greens are you foraging this time of year?  Let us know in the comments section below!

The Recipe
2 lb roast (lamb, pork, venison, or chicken)
1 lb carrots, sliced
1 lb potatoes, cubed
1 lb celery, sliced
0.25 lbs green onions, sliced
Stems from 1.5 lb sorrel
1 cup water
1 Tablespoon each garlic powder, oregano, black pepper
1.5 teaspoons each salt and red pepper
0.5 cup heavy whipping cream
0.5 cup plain yogurt
2 Tablespoons flour

Leaves from 1.5 lb sorrel
3 garlic cloves or 1 teaspoon garlic powder
0.5-0.75 cup pine nuts or sunflower seeds, or 0.25-0.5 cup ground almonds
0.5 teaspoon salt
0.25-0.5 cup olive oil
0.5 cup grated cheese

3 Tablespoon butter
6 slices bread

Cook roast, carrots, potatoes, celery, green onions, and sorrel stems in the water in a crock pot until meat is cooked through and tender, seasoning with garlic powder, oregano, black and red pepper, and salt to taste.  Remove meat, trim and slice.  Add whipping cream, yogurt, and flour to remaining soup, cook until slightly thickened.  While roast is cooking, make pesto from sorrel leaves, garlic, nuts, salt, olive oil and cheese. (Put everything in a food processor and process until creamy and spreadable.  Coarsely chop sorrel leaves before adding to processor to avoid bridging.)  Melt butter in frying pan, brown one side of bread, flip, and brown other side.  While the second side is browning, top bread with pesto and sliced roast.  Serve with soup and smiles.

Read more

Saturday, May 28, 2016

What is an Aquaculture Technician

0

Also known as "Fish Farmers" or "Fish Farm Workers", Aquaculture Technicians are the front line and the core workers responsible for maintaining fish farms and in ensuring proper husbandry of the farms livestock.

Technicians raise and harvest fish, shellfish, and plants in fresh or salt water. The fish and plant life they grow are sold for food or used to replenish wildlife stocks for recreational or commercial fishing.

Aquaculture workers are the first to see and respond to any problems with production. They are normally responsible for feeding the stock and calculating how much food is needed. Another key task is to maintain optimal water quality through monitoring and control. A fish farmer at times will need to check the stock for stress, health and disease and take preventive or remedial action when necessary. They also collect and record growth and production data and are involved in the harvesting of market sized fish and the stocking of young.

In a land based “tank farm” technicians may be required to install, operate, maintain and clean pumps, filters and other equipment. They will need to clean - maintain tanks and “raceways” used to hold and grow the fish. Farm technicians will undertake basic record keeping and reporting in both written and verbal formats. Workers may also be required to clean and prepare the fish for market.

Aquaculture technicians may be required to work both indoors and outside. The work outdoors may be in all kinds of weather. The tasks "chores" can be physically demanding and include some lifting and carrying.

The Aquaculture technician must be ready to do a variety of work tasks. They are usually given a good deal of responsibility and much of the time could be working unsupervised. Good observational skills and plenty of patience are required.

Aquaculture is more than a job; like land farming, it’s a way of life. Technicians often work seven days a week, with time off after. Shift work is common, including weekends and holidays. Aquaculture workers are employed by private aquaculture operations, government fish hatcheries and experimental aquatic farms.

In the course of their career, the right person can advance and become manager or owner of an aquaculture operation, supervising other technicians and operations. To become a manager or owner, good administrative skills, practical experience, and a high level of technical understanding are required and they must know how to deal with people. A technician seeking self-employment also needs to be a good business planner and long term “thinker”, since it may take two to three years before the stock they raise is sold.

Many technicians (with the desire) have gone on to become self-employed, owning and operate their own aquaculture farms, after the gaining experience and practical knowledge required and after evaluating the risks and commitments involved in owning a business.

Related Links and articles:
" Overview of an Aquaculture Technician Training Program "
"Aquaculture Industry Jobs and Employment"

Read more

Friday, May 27, 2016

An Unfortunate Choice of Words for the Local Holiday Food Drive

0

At the risk of being called a "Debbie Downer" during this time of giving, I feel I must add my two cents to the otherwise noble effort by a group of businesses to partner with Roadrunner Food to collect non-perishable food items during the holidays.

The image on the left is a scan of the paper bag that was inserted in between the various sections of The Albuquerque Journal  this week. The paper bag presented a misleading message to the public:"Solve Hunger" by donating food. A better word would be "Help Alleviate Hunger."

To actually solve hunger, we must solve some of the structural problems that cause hunger, one of which is poverty and related factors like unemployment, underemployment, low wages, lack of access to affordable and nutritious food, a high level of debt and other causes. There are 50 million of our neighbors who do not know where their next meal is coming from, including 360,000 in New Mexico who are at risk of hunger.

"Despite the end of the Great Recession and a falling unemployment rate, the nation continues to be plagued by a very uneven recovery; low employment rates; stagnant wages; inadequate public investments; and inadequate public safety net programs. Yes, there has been progress. But it has been too slow," the Food Research and Action Center (FRAC) said in its recently unveiled Plan of Action to End Hunger in America.

And how much difference does the food drive make?  It certainly helps increase the amount of food available to Roadrunner Food Bank and all the Feeding America affiliates around that country. That is an important reason why we all should participate in this holiday drive. Go to your local grocery store (instead of emptying your pantry) and buy $10 or $15 worth of non-perishable food items and leave them by your mail box on Saturday. Or better yet, take them directly to your nearest post office.

"More than half the households in New Mexico have to make really tough decisions every day," said an editorial in todays edition of The Albuquerque Journal, one of the sponsors of the food drive.  "Sixty-one percent choose between spending on food and utilities. Sixty-six percent between food and transportation. Fifty-nine percent between food and medical care. Forty-eight percent between food and housing. But there’s an easy choice more fortunate New Mexicans can make today and Saturday. That’s to fill the brown grocery bag in Thursday’s Journal with nonperishable food,"

The brown paper bag also contains some handy tips to help Roadrunner Food Bank, including signing up for programs where retailers donate a portion of your holiday purchases to our local food bank. And you are also given an opportunity to text a donation.  Here is why the financial donations are important.

"Feeding America, the nation’s largest hunger relief organization, annually serves 46.5 million people across the U.S. through its network of 200 food banks, according to its "Hunger in America 2014" study," said an article The Huffington Post. "But what you may not know is that these organizations have limited resources themselves. While approximately 100 million pounds of food is donated to Feeding America food banks each year via canned food drives, these items alone won’t solve the issue of hunger that so many Americans face. Tight budgets, limited volunteers, finite donations, and the short turnarounds required between receiving fresh foods and distributing them to families in need can be challenges in addressing the issue of hunger – and doing so with nutrient-rich foods."

The holiday food drive should give us at least a small opportunity to show solidarity with those who receive the food. One way to do this is to be aware of the reasons why families are in their current predicament.  It doesnt help when the campaign tells us that we are actually solving hunger through our holiday donations.

Read more

Wednesday, May 25, 2016

Wood Ash Leavening Chemistry An Extraction of Historical Accounts

0

Leigh over at 5 Acres and a Dream recently did a fascinating series of blog posts on producing leavening from wood ashes (Part 1, Part 2, and Part 3).  The high-level overview is that wood ashes contain potassium carbonate, which can be extracted and used as leavening for quick breads, biscuits, etc., similar to how baking soda is used.

Leigh made some pretty tasty-and-leavened-looking biscuits with her extracted carbonate (and with straight wood ash), but noted that they didnt rise quite as well as the control biscuit (which had baking soda).  There were also a few unanswered questions on the chemistry involved, so we wanted to follow our nerdy instincts and dive into the nitty gritty of whats happening at the molecular level.

First issue: what is actually being extracted from the wood ashes?  Carbonates, we suspect, but is that it?  In our minds, theres a controversy, since the process of extracting carbonates for leavening sounds an awful lot like the process of extracting lye (potassium hydroxide, KOH, in this case) for soap making.  Were especially keen on figuring this out because if both hydroxides and carbonates are present, it will change our biscuit recipe (specifically, well have to add more acid to get the leavening effect). Lets compare some descriptions.

 The very cool Caveman Chemistry website says that the major components of wood ashes are potassium and sodium carbonates, but says this of the extract:
"It contains all of the soluble materials which were present in the the ashes to begin with. This could include sodium and potassium chlorides, sulfates, hydroxides, and carbonates."
So, it sounds like both carbonates and hydroxides could be present.  Another account of potash and pearlash production from 1866 is generally consistent with that (despite a distinct lack of cavemen in 19th century North America), but doesnt mention hydroxides:

"Carbonate of potash is generally obtained from wood ashes...the soluble constituents of the ashes are the carbonate, sulphate, phosphate, and silicate of potash and chlorides of potassium and sodium.  The insoluble constituents are carbonate and subphosphate of lime, alumina, silica, the oxide of iron and manganese, and a dark carbonaceous matter."

That same account also describes the process for preparing the potash and pearlash:

"In America, the ashes are lixiviated [extracted] in barrels with lime, and the solution evaporated in large iron pots or kettles, until the mass has become a black color and the consistency of brown sugar.  In this state it is called, by American manufacturers, black salts.  ... To make the substance called pearlash, the mass called black salts...is transferred from the kettle to a large oven-shaped furnace, constructed so that the flame is made to play over the alkaline mass. ... The ignition is in this way continued until the combustible impurities are burnt out, and the mass, from being black, becomes dirty bluish-white, having somewhat of a pearly lustre, whence the name pearlash. The coloring matter is probably in this case manganate of potash."
In a process flow diagram, it would look something like this:

Pearlash historical production process flow diagram
Other soluble minerals (OSM) seemed like a better acronym than Minerals of Unusual Solubility (MOUS). (Warning: obscure pop culture reference.)  You can buy pure potassium carbonate these days, and its bright white.  To visualize the color of pearl ash, think of this color, but very faint.

So, no mention of potassium hydroxide in the old-time production, but that might be because of the production method.  The CO2 in the combustion gases that are passing over the black salts reacts with KOH to make KHCO3 (or to make H2O and K2CO3); any KHCO3 produced decomposes to K2CO3 in the heat.  So basically, if hydroxides are extracted into the ash water, they dont make it into the pearlash.

But, compare the process of making ash water for leavening with any of several similar descriptions of the process for preparing lye for making soap.  For example, this one:

"Traditionally, one uses an old wooden barrel or lye hopper for this, even hollow treetrunks in some areas. ... In the bottom, put a filter made from a couple of inch depth of twigs, and the same again of straw or hay. This helps ensure the lye comes off moderately clear. Stand the lye barrel up high enough to get a container underneath...and fill it up with those ashes. Add water. ... Leave it all overnight...[then] let the lye run out into your container."

Other descriptions call for adding lime (or slaked lime), which we noted increases the hydroxide yield by converting carbonates to hydroxides by the following reaction:

 Ca(OH)2 + K2CO3 = 2 KOH+ CaCO3

There is also a journal article in the peer-reviewed literature, which claims the ratio of hydroxides to carbonates in their crude ash extracts is 92-to-8, and more anecdotal observations that carbonates dont work very well for making soap (but ash water does) and that crude ash extract by itself doesnt do much leavening.  Therefore, it seems very likely that the crude ash water extract contains an appreciable amount of hydroxides along with the carbonates.

So theres the theory--probably both carbonates and hydroxides are present in the ash water.  Fortunately, we dont have to just sit around, dealing in hypotheticals.  We can experimentally measure the amounts of carbonate and hydroxide in the ash water through the magic of titration. (If youve suffered through an analytical chemistry class in college, we hope you didnt just throw up in your mouth a little bit.)

Wood ash and water extract
O ash water, what mysteries containest thou for us to unravel by the labor of titration?

Well give you a few days to stew over that and hit you in a few days with a chemistry-dense post interspersed with colorful pictures.


Read more

Friday, May 20, 2016

An Action Plan for Healthier Farms and People in New Mexico

0

New Mexico faces a stark paradox: ranking close to the top of the list in food insecurity and child and senior hunger, while about one-quarter of our population suffers from obesity and numerous diet-related chronic diseases. Public meal programs are critical opportunities for addressing the health and well-being of New Mexicans and there is real promise for those fruits and vegetables to be provided by New Mexico growers. -from The Power of Public Procurement: An Action Plan for Healthier Farms and People in New Mexico,September 2014
Cover: Seed Art Mural, Bernalillo County Youth Detention Center
Photo Courtesy of: Jade Leyva, Curator for SEEDS:A Collective Voice Multimedia
Exhibits, Community Seed Mural Projects Co-Artist & Coordinator


Over the past week we published blog posts on the links between health and hunger from the Bread for the World Institute, New Mexico Voices for Children and and First Choice Community Health Care. An important aspect of providing healthy food to the population, particularly low-income communities, is to ensure that fruits and vegetables are available at affordable levels. The produce does not need to be trucked from California. Rather, there is an abundance locally.

A little more than a year ago (in September 2014), Farm to Table and New Mexico State University (via the Department of Agricultural Economics and Agricultural Business, the Department of Plant and Environmental Sciences and half a dozen agricultural extension offices) published a report that attempts to identify and understand the potential and current barriers that New Mexico farmers and New Mexico’s public institutions face when trying to sell and purchase locally grown fruits and vegetables for their respective meal programs.

The report, entitled The Power of Public Procurement: An Action Plan for Healthier Farms and People in New Mexico, recognizes that a potentially significant market exists for the sale of New Mexico grown produce to the State’s public institutions. This is particularly true for the school districts’ food service programs.

"A large, and until recently, untapped, commercial exchange may be fostered between fruit and vegetable growers and the public officials who administer the procure-ment systems of public institutions," researchers said in the executive summary of the report. "Yet, practicalities and barriers currently impede the process."

The authors of the report make a number of recommendations at various agency and inter-agency levels, placing a strong emphasis on schools, but also on senior centers, state corrections institutions, and farming and agriculture.  Read the executive summary and the full report.

Read more

Best Plants to Grow in an Aquaponics System

0

 Best Plants to Grow in an Aquaponics System


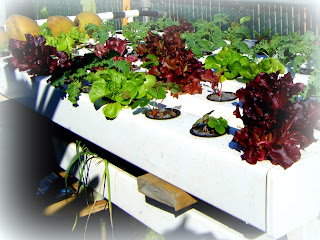
There are many plants that grow well in soil less farming.  These include vegetables, aquatic plants, flowers and even fruit trees.  There are other vegetables that will not work well in an aquaponic system.  Root vegetables such as carrots, onions and potatoes should not be used in these systems.  You can grow them, but it would not be easy.  They need a medium close to soil like sand in order to grow.


So what plants should I grow in my Aquaponic system?

Leafy Green Vegetables

Cabbage and Lettuce are two of the most common grown vegetables in aquaponic systems.  They grow really well and are easy to take care of.  Other good choices are basil, peas and green beans.

Fruit Vegetables

Some of the top vegetables you see in a typical garden are tomatoes, cucumbers, squash, peppers and even corn.  They all can be grown successfully in an aquaponics system.cucumbers

Viney Plants


Plants that produce vines are a great choice for aquaponic systems.  They are only rooted in the growth bed and can grow elsewhere leaving more room for the other plants.  Examples of these are cucumbers, pumpkins and gords of all shapes and sizes. 


Flowers


Finally there are flowers.  I have seen greenhouses running aquaponics systems that are full of flowers.  You can have a successful business especially in northern areas by selling flowers to local businesses.  There are many popular flowers that can be grown, roses are lilies to name just a few.  They all will grow fast and well in this type of system.
flowers
The trick to being successful with your plants is to try a variety of plants to see which ones will grow well in your climate.  Your plants will need a lot of care at first in order for them to really take off.  You may want to find some supplements.   Seaweed is a very popular supplement that is used in aquaponic systems.  The seaweed extract are great for growth, but you need to be careful what you add to your system.  An additive that helps your plants grow, might cause issues with your fish or bacteria.  Make sure you find additives that will ensure your plants, bacteria and fish all will thrive in your system.

Read more

Thursday, May 19, 2016

An Emergency Apple Picker

0

We realized earlier this summer that the apple tree by our garage was growing apples in places that were going to be hard for us to reach while standing on a solid surface and using only our hands.  The tree was (is) of such a disposition that climbing to the very limits of its human weight support system (or setting up a ladder in the most clever way we could conceive) would not improve our harvest by much.  What we needed was an apple-picking device attached to the end of a long pole.

In typical fashion for us, we allowed this deficiency to persist until the last possible moment, when the apples were ripe and starting to pick themselves (with some help from the local squirrels and raccoons, who charge a fee of several bites per apple picked).  So, we needed an apple-picking device immediately.  The tool we needed is available from the local DIY centers, but for a hefty fee.  The tool can be found online for considerably less, but the urgency of our predicament would have required that we shell out for expedited shipping, again at an exorbitant sum.  And then, why pay anything at all when we could build one at home for free (save for a half hour of our time) from the leftover scraps of our other projects?  Thus, last Saturday saw the birth of our homemade emergency apple picker, and the collection of every last apple daring to dangle from our tree.

An example of the challenge with which we were tasked and the bounty that awaiteth.

The tool itself is pretty simple: a handle of leftover electrical conduit from the row cover chicken tractor and a section of woven wire fencing trimmed from the strawberry cage, held together with a section of scrap 2 x 4 and a 2" stove bolt. 

The connections of the wood to the pole and fencing.  We added some glue to the wire-holding holes for extra support.

Add a couple of old socks to pad the fall, and its ready to go!

The reach can be extended significantly with some duct tape and a section of broken pole vaulting pole. (Who doesnt have one of those laying around?)

A small fraction of the harvest: delicious and pristine Macintosh apples, destined for apple jam, apple sauce, apple pies, apple crisps, and the like.

What do you use to pick your high-up apples?  What other tools for fruit picking have you devised?  Let us know in the comments section below!


Read more

Wednesday, May 18, 2016

Climate Change is an Ethical and Moral Concern

0

The Circo for the Community fundraiser on Saturday, March 5, will benefit five organizations, including New Mexico Interfaith Power & Light (NMIPL). Here is a preview of a full video that will be shown at the fundraiser, which will also benefit the New Mexico Conference of Churches, La Mesa Arts Academy, the New Mexico Faith Coalition for Immigrant Justice (NMFCIJ) and the Albuquerque Aerialist Collective.  (We posted a video from the NMFCIJ earlier this week).Tickets are $35 and can be purchased on the NMCC site or at the door (you can write a check for any of these organizations). The cost of the ticket includes dinner and a reception.

Read more

Tuesday, May 3, 2016

Wishes for an Abundant New Year

0

As the pages of the calendar turn to a new year our tendency is to wish our friends and family a Happy New Year.  And if you are in Latin America and other places around the world, the wish is for a Prosperous New Year.  Happiness and prosperity are good things to wish for our relatives, friends and acquaintances. The symbolic transition, however, gives us a great opportunity to make an alternative kind of wish: an Abundant New Year. On this day we celebrate Gods abundant love for us (Isaiah 49:15-16 and Jeremiah 31:3) and we resolve to share this abundant love with others (John 15: 9-14)

So, as 2016 begins, I wish everyone Gods abundant love in our hearts, our minds to guide us as we live our lives in the coming year.

Read more

Monday, April 18, 2016

How to start an aquaponic system

0

Starting an aquaponic system

Introduction

This experiment is an introduction into the functions and management of a small aquaponic system. Like a home aquarium, an aquaponic system requires special attention in the first weeks, since the microbial community in the water and in the plant boxes need some time to get established.


Learning goals

  • Know why an aquarium requires a filter.
  • Know how to monitor the water quality by using simple aquarium test kits.
  • Be able to explain what the measured factors indicate in terms of water quality, fish health and plant growth.
  • Understand how to react in case of bad water quality in the aquarium.
Starting an aquaponic system

Background information

There are at least three species of living organisms in an aquaponic system. There are fish, plants and bacteria. In our small classroom system we will have about four goldfish in the aquarium, 60 plants in the plant beds and about 100000 billion of bacteria and other very small species in the gravel or LECA. Bacteria have been on this planet for 3 billion years while man exists for at most 3 million years, and our civilisation for just 10000 years. A human being couldnt survive a day without the help of bacteria and neither would the fish and plants in our classroom system.
The fish need oxygen to survive - in the same way as human beings, i.e. by breathing - but the fish take oxygen from the water and excrete ammonium and carbon dioxide over the gills. There is also ammonium in the excrements (faeces) from the fish. The ammonium in the water can become dangerous to the fish. The bacteria can transform ammonium into a substance (nitrate) which is harmless to the fish and at the same time an important plant nutrient. This process is called nitrification and it is necessary to supply the plants with nitrogen fertilizer.
So the first thing we need to do before we put any fish in the aquarium, is to start growing a lot of bacteria in the plant boxes, so that they can take care of the fish excrements i.e. the ammonium in the water.


Another important factor influencing the water quality is pH. It indicates whether the water is acidic, neutral or basic. The pH is measured on a scale of 1-14 with 7 being neutral. Is the pH lower than 7, the water is acidic, if it is higher, the water is basic. Depending on the fish species, the optimum pH varies. Goldfish tolerate variations in pH much more than other fish species, but to avoid stress, the pH should stay within the range of 6.5 - 8.

Time requirement

The starting phase should last at least for three weeks.

Material requirement

  • 1 classroom aquaponic system
  • 1 aquarium test kit for ammonium (NH4+)
  • 1 aquarium test kit for nitrite (NO2-)
  • 1 aquarium test kit for nitrate (NO3-)
  • 1 aquarium test kit for pH
  • 1 bacteria starter package for aquarium filters
  • 1 aquarium thermometer


Lets start

Start the biofilter - multiply the bacteria! Fill the system with water and start the air pump. It is important to keep the oxygen level high for the bacteria to thrive. The water pump is now circulating the water through the system. There are different ways to multiply the bacteria. For example you can add a starter package of bacteria, or you add a very small amount of ammonium to the system in order to feed the already present bacteria in the substrate. We suggest to add a fertilizer containing ammonium, to achieve an ammonia concentration of 10 mg/l. If using ammonium sulfate, you would add 4.7 g of the powder to 100 l of aquarium water.

Is the filter working? If there are enough bacteria in your filter to transform ammonium into nitrate, your filter is working. To find out, you need to measure ammonium, nitrite and nitrate. You can begin with measuring the ammonia concentration and monitor, how every day it is decreasing. After a week you can start measuring nitrite and nitrate, using the sticks from the pharmacist or the aquarium dealer. During the first days you can have some indication of nitrite but when the system is ready you should have no response of nitrite. It normally takes between three to six weeks to multiply the bacteria enough so they can digest the ammonium amount that will be caused by the application of fish food.

Control and regulate pH! To measure the pH in the water use the pH-sticks. If the value is between 6.5 and 8, there is no need to do anything. If it is above or below that value,change part of the water! If you feel experienced enough, instead of changing the water, you could add formic acid in case the pH is higher than 8. Add one part of the acid to 50 parts of water and use a drop of this solution every day until pH is right. If pH is too low, you can add a tea spoon of calcium hydroxide or potassium hydroxide in a cup of water and use a drop of this until pH has the right level.

Temperature: Temperature is very critical because it influences other water quality variables. For example cold water can hold more dissolved oxygen than warm water. Fish are very sensitive to changes of temperature, smaller fish being more sensitive than larger ones. Goldfish belong to the group of coldwater fish and prefer temperatures between 18 -25 °C. They will tolerate any temperature from 4-30 ºC however, as long as the water still contains enough oxygen and low amounts of ammonia. Remember that the body temperature of fish is always the same as the water temperature. Therefore, in colder water fish will eat less or stop eating at all when the temperature drops below 9 °C (Mette, 2006). On the contrary, in warmer water fish will digest faster and get a lot more hungry. Be careful, though, not to give too much feed! More feed means that the fish need more oxygen, but in warmer water there is less oxygen. So these two factors are working against each other, and you have the balance in your hand.

See and feel

  • Ammonia (tolerance value: < 0.8 mg/l) and Nitrite (should be 0 mg/l at all times, max. 0.2 mg/l) (measure each second day).
  • Nitrate - its raising indicates that the filter process has been started (once per week). The nitrate value should be between 10-100 mg/l.
  • pH should be between 6.5 and 8 (once per week).
  • Water temperature should be between 18 - 25°C, depending on the fish species
  • If the values of ammonia, nitrite, nitrate and pH are out of range, stop feeding. In severe cases, change part of the aquarium water.

Didactical comments

In order to understand the process of nitrification, or what happens in the filter, some basic knowledge in chemistry is required. However it is possible to explain it in using metaphors: two little animals (bacteria) are responsible to transform the poison (ammonium) into a non toxic substance (nitrate), which at the same time will feed the plants. With the ammonia and nitrite test kit we indirectly measure the existence and quantity of these bacteria.

Aquaponics, ækw??p?n?ks, pisciponics http://aquaponics-commercial-backyard.blogspot.com.es/

Read more

Thursday, March 31, 2016

What Equipment You Need for an Aquaponics System

0

 What Equipment You Need for an Aquaponics System

An aquaponics system is a symbiotic marriage of plants and aquatic animals cultivated in a recirculating environment. There are various types of aquaponic systems used for growing vegetables or plants. Knowing how big you want your aquaponic system to be before you purchase it will allow you to set a budget. Read on to learn a little about the basic equipment needed for aquaponics systems.

Fish Tanks and Stand Pipes and Tanks Stands

Aquaponics is a blend of aquatic animals living in an environment where they provide the nutrients for the plants or vegetables growing in the same water in which they live. To begin creating your aquaponics system, you will need to decide which fish and other fauna you would like to house and how many you need. They will need a tank to live in and the tank requires stand pipes. You will also need to position your tank on a steady area or stand.

Clarifiers

You will need clarifiers for your aquaponics system. These are highly recommended as the best way to remove solids from the culture water. They also assist with the de-nitrification process and remove ammonia and nitrates. They are responsible for removing almost all of the water in the recirculation system and they can be used many times over with just marginal replacement needed from flushing the system to remove any solids that get trapped.

Bio-filters

Keeping the water clean and balanced in your aquaponics system is essential to keep it running efficiently. Bio-filters are a great way of controlling water pollution by biologically degrading and processing pollutants. There are horizontal bio-filters and upright bio-filter tanks available as well as a range of other types.

Oxygen Systems

Because you are keeping fish in your aquaponics systems, you will need an excellent oxygen distribution system. This is one of the must-have features as this is highly intrinsic to the health and growth of the fish. It will distribute oxygen to an optimum level suitable for the fish you have in your system.

Pumps

You will need a pump (or multiple pumps, depending on your system set-up) and the pumps serve a very important purpose. They will pump the water around the system, allowing it to be cleaned as it goes through the bio-filter and will return the fresher, cleaner water to the tank for best results.

Sundries

There are other smaller items needed to get your new aquaponics system up, running and performing as you need it to. Pipes and tubes and other accessories will be required and the best place to find them is in a kit found at a specialist store on website. Learn as much as you can about how aquaponics work before you commit to buying a complete system.

Plants and Fish

You will want your aquaponics system to function well for both your plants and the aquatic creatures you want to live and grow in your system. Choose the right fish that support the plant environment for the best results.

Read more: http://www.doityourself.com/stry/what-equipment-you-need-for-an-aquaponics-system#.UgubGqxNX0c#ixzz2bxKAE4jn

Read more

Sunday, March 20, 2016

Pollination in an Aquaponics system

0

One of the challenges of growing in an indoor aquaponics environment is that we don’t have nature’s pollinators available to us. But is this a big problem for most aquaponic gardeners? It depends entirely on what you are growing. The only time that you need to worry about pollination is when you are growing a plant to harvest its fruit (e.g. tomatoes, cucumbers, melons, etc.) or if you are saving seeds and you need the non-fruiting plants to produce seeds.


Aquaponics, ækw??p?n?ks, pisciponics


Let’s start with a brief lesson on plant physiology and how pollination happens. Plant flowers actually contain reproductive parts known as ‘essential organs’. The male organ is called the ‘stamen’ and it is comprised of the long, stem-like ‘filament’ that is capped off with the ‘anther’ that contains the pollen. The female organ is called the ‘pistil’. At the top is the pollen receptacle called the ‘stigma’, followed by a tube called the ‘style’ which terminates in the ‘ovary’ which contains the eggs. Pollination is the act of getting the pollen from the male stamen into the female stigma so it can travel down the style and fertilize the eggs in the ovary. Flower petals attract insects to the flower which in turn unwittingly transfer the pollen (I’ll bet you are now realizing that this amazing plant sexuality is where the phrase ‘the birds and the bees’ comes from!).
But not all plant flowers are ‘complete’, i.e. not all plant flowers contain both male and female organs. In fact, horticulturalists divide plants into four pollination categories based on the location of their essential organs.
  1. Self-pollinating - Complete flowers that don’t need insects or wind to pollinate them. This group includes beans, peas and tomatoes. Vibrating or tapping the flowers of these plants will help with release the pollen and promote maximum fruit production.
  2. Requires pollen from an unrelated plant. The only vegetables in this category are cabbages and radishes, and pollination is only required if you are growing the plant for seed.
  3. Cross-pollination group. These make up the largest group and each plant has both male and female flowers. This group can be broken into two subgroups.
    1. Windblown pollen – Vegetables in this subgroup are sweet corn, beets, carrots and onions. Of these, only corn needs to be pollinated for food crop production as the corn kernels are actually seeds.
    2. Pollinated by insects – Some of these vegetables are self-pollinating, but the fruit set will be greater if insects visit the flower. Fruits and vegetables in this group include broccoli, collards, cauliflower, cucurbits (cucumber, cantaloupe, pumpkins and watermelon), okra, peppers and squash.
  4. Male and Female plants. The best examples are asparagus, spinach and some hybrid cucumbers. Again, pollination is only required if you are growing the plant for seed.
The bottom line is that unless you are growing plants to save their seeds, the only time that you will need to become actively involved in the transfer of pollen from the male organ to the female organ is with the Cross-Pollination group that is pollinated by insects (Group 3.2). And in this group the only fruits and vegetables that you can practically hand pollinate are the cucurbits (cucumber, cantaloupe, pumpkins and watermelon) because they have large flowers. How do you do this? Early in the day, while there is a lot of pollen on the flowers, follow these steps:

Aquaponics, ækw??p?n?ks, pisciponics


  1. Identify the male and female flowers. The female flowers have the stigma, which receives pollen, and the male ends have a stamen containing pollen. The pollen can be any color, including a light yellow, dark yellow or white.
  2. Touch the stamen of the male flower to make sure it is ready for pollination. If your finger has pollen on it, the stamen is ready.
  3. Touch the tip of the stamen, or the anthers, with a cotton swab, artist’s brush or your finger. Pollen should adhere to the swab. You can also remove the flower from the plant and fold the petals back, exposing the stamen.
  4. Transfer the pollen to the female flower’s sticky stigma.
  5. Repeat the process until you have pollinated as many of the flowers and plants as you desire.


Aquaponics, ækw??p?n?ks, pisciponics http://aquaponics-commercial-backyard.blogspot.com.es/

Read more

 
Powered by Blogger